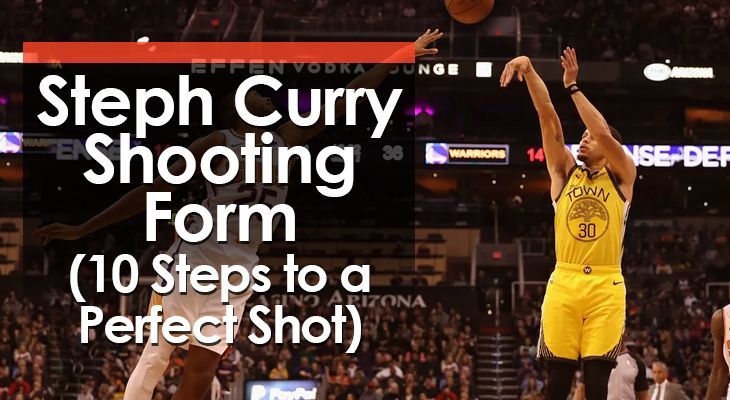
If there's one skill that dominates the modern game of basketball, it's shooting.
The game is dominated by guards who can shoot from virtually anywhere and basically every player on the court has to provide spacing, too.
If you were to select the face of this new age of long-distance shooting and floor spacing, there would be none more deserving than Steph Curry.
A dominant guard whose limitless range is matched only by his confidence.
He’s on pace to make the most threes in NBA history, and many (including myself) consider him to be the greatest shooter of all time.
Given how important shooting is, we could all benefit from learning from the best in the world.
What makes Steph Curry such a shooter and should your players replicate his form?
If you’re interested in the answer, read on.
In this post, I’ll break down Steph Curry’s shooting form to give you the blueprint for teaching your players how to shoot.
Individual Differences Between Shooters
First, a disclaimer...
No two players have the exact same shooting form.
Every single player is built differently and they all apply the established shooting fundamentals in a way that is most suited for their bodies.
Things like wingspan, height, hand size, finger length, and explosiveness all affect technique.
That’s why trying to copy another player’s form motion for motion almost never works.
You should instead try to understand why that player’s form works and apply that knowledge to your own physique (or the physique of your players).
Certain elements of Curry’s form aren’t exactly textbook... but you can’t argue with his results.
I’ll be sure to point these elements out as we go along.
Before we get started, sit back and enjoy all 402 three-pointers from Curry's 2015-16 season.
Steph Curry Shooting Form (10 Steps)
Since shooting is a complex motion that involves the entire body, I’ll separate this segment into three phases to make things easier to follow and understand.
The phases:
- Setup
- Shooting Motion
- Follow-Through
I’ll break each phase down into specific steps and explain each step in detail so that you can understand exactly how Steph Curry shoots and why he’s so successful.
The Setup
Preparation for the shot plays a huge role in whether you make or miss.
The preparation will differ depending on whether you’re shooting off the catch or off the dribble.
I’ll go over what Curry does in both cases for this breakdown, but I suggest you focus on standstill shooting first.
Step 1 - Stance
If he’s stationary, Curry will be waiting for the ball with his hands ready to catch it around waist height (his shooting pocket).
His legs are bent and primed to generate the force needed to get the shot off.
All players should know that legs generate power for the shot and the arms guide the ball.
This loaded position allows him to minimize the motion needed to get his shot off once he gets the ball. In other words, it makes his release as quick as possible.
This is a textbook stance that every player should follow.
Guards usually have a narrow stance when shooting because it allows for a quicker release.
However, Curry is mostly a wide-stance shooter.
He compensates for this by pointing his knees inward once he goes for the dip.
This inward knee bend is one way Curry’s shot deviates from what is considered perfect form. I don’t recommend copying this because it’s not optimal for most people and it will slow you down.
Off the dribble, he is already low and there’s little need to adjust his stance before taking the shot. He just puts the ball in his shooting pocket.
Note that he prefers to get the ball into his shooting pocket using his off-hand whenever possible.
This lets his shooting hand go right into the shooting motion without any extra movement that could throw off his accuracy.
Step 2 - The Turn
Coaches often tell players to keep their body squared to the basket with their toes pointed towards the rim and their feet shoulder-width apart.
This is a huge mistake!
Positioning your body like this creates a lot of tension once you get into the shooting motion.
That’s why Curry and other elite shooters utilize the turn.
Instead of pointing their feet to the basket, they keep their feet parallel but turn them slightly to the side. The foot on the side of the shooting hand is put slightly in front of the other one.
Since Curry is a right-handed shooter, he turns his feet slightly to the left of the rim with his right foot in front.
A left-handed shooter would do the opposite.
Think 11 and 1 o’clock positions, respectively.
This lets Curry align his body to the rim and complete his shooting motion without tension.
Many great shooters, including Curry, utilize the turn without even realizing it. Curry claims to be a square shooter but the footage clearly disagrees.
Things change off the dribble or when he is sprinting around a screen.
In these situations, he’ll square up to the basket to cancel his momentum and he’ll execute the turn in the air.
This gets him proper alignment but it’s a very advanced technique.
It works because Curry has mastered the fundamentals so well that he can hit the target on even the most off-balance shots.
Step 3 - The Catch
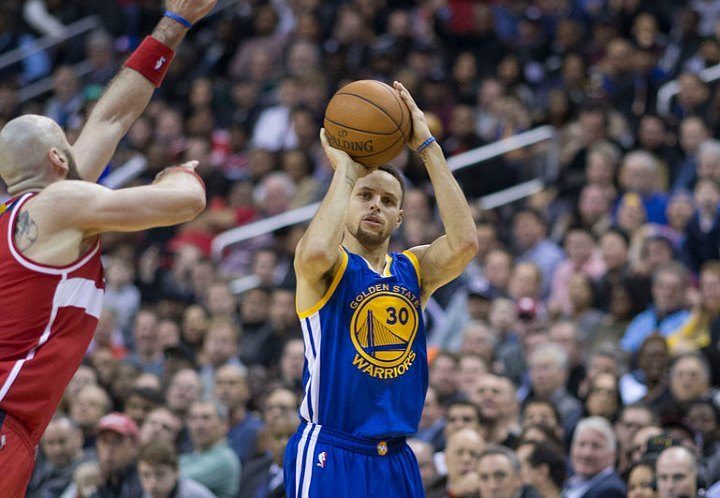
As soon as Curry catches the ball, he puts it into his shooting pocket (if it’s not there already).
He places his shooting hand on the side of the ball, above the horizontal middle of it, and his entire hand makes contact with the ball.
This hand will change position a bit later on but this starting position is required for proper alignment.
His fingers are spaced out and his index finger and thumb form a natural “V” shape. The hand is relatively relaxed so there’s no tension.
The shooting arm elbow is close to his side to help with alignment, and he holds the ball a bit in front of the midline of his body to start the shooting motion.
This distance and ball position make it possible for Curry to keep his shooting motion straight and on target all the way through.
His off-hand is placed on the opposite side of the ball from the shooting hand.
This is exactly how it should be and all players and coaches should learn Curry’s hand positioning on the ball.
Step 4 - Aim
Curry aims while he’s catching the ball so that he can let it fly as quickly as possible.
Many coaches advise aiming for the middle of the basket, which is not always easy.
Curry simplifies this process by aiming at the point of the rim closest to him where the rim and the net meet.
This works very well and players should definitely try it.

The Shooting Motion
By now you should have a pretty good idea of the position Curry’s in after the catch.
He has the ball in his shooting pocket with both hands in full contact with the ball. His feet are turned slightly with his right foot in front, and he’s locked in on the rim.
He calls this the “catch-ready position” and his shooting motion starts from here.
Step 5 - The Dip
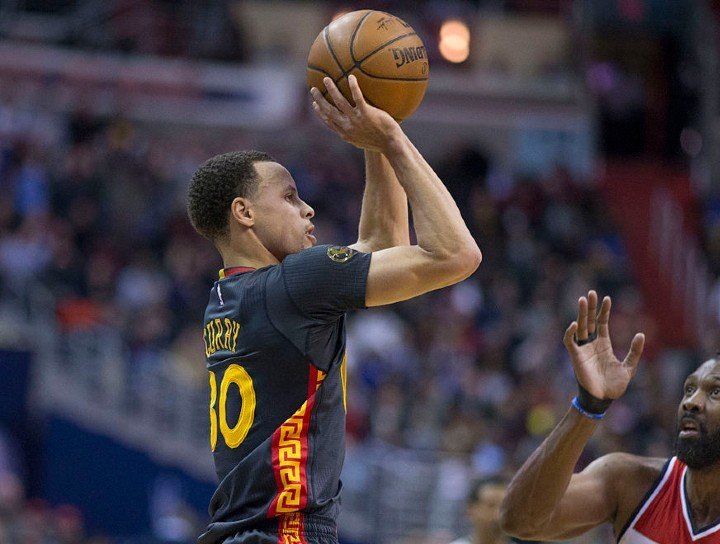
Curry starts his shooting motion by bringing the ball down slightly before starting to move it up.
This is called “the dip,” and it generates power for the shot.
Curry’s dip is shorter than most players and he claims not to dip the ball at all. This is true only when he shoots off the dribble because the final dribble acts as the dip.
A quick dip leads to a quick shot. Curry never slows his dip down because that would destroy his power generation.
He likes to catch the ball as close to his catch-ready position as possible to speed up the dip.
He also uses the dip to create rhythm.
As the ball goes down, his legs bend just a little bit more to generate power. Think of both of these motions as loading the spring.
Once the spring is loaded, he’s ready to start the upward part of his motion.
I should mention that many players utilize the hop when shooting off the catch. This is a very effective way to generate great rhythm and power on your shot but Curry rarely uses it.
Most of the time, he’ll replace the hop with simply bringing his right foot forward while his left foot stays planted.
He will still bend his knees to load the spring, however, so this just seems to be his personal preference.
The right foot plants just as the ball reaches the bottom of his dip to ensure the best possible energy transfer.
If he can’t ensure a smooth transition from his catch into the dip, he’ll take a dribble to generate proper rhythm.
Curry is an absolute master of creating rhythm for his shot!
If there’s one thing you’ll learn from the way he shoots, learn how he creates rhythm.
Even if your mechanics are off, improving rhythm will lead to more makes.
Step 6 - Upward Motion
Curry’s a midline shooter.
This means that he brings the ball up along the middle of his body to the set point.
In order to ensure a smooth energy transfer, he starts moving the ball up and extending his legs at the exact same time.
As the ball comes up, Curry rotates his shooting hand behind the basketball so that he can reach his set point without losing alignment to the basket.
If you were to observe from his right side, the path of the ball would resemble the letter S.
It’s very close to his body at the bottom of the dip but it will move away from it a bit as his shooting hand rotates behind the ball.
Then it gets close again as he reaches his set point, and the release completes the S.
Step 7 - The Set Point
Curry reaches his set point before his feet leave the ground.
His shooting hip, elbow, and forearm are in near-perfect alignment when he reaches the set point.
All of this is textbook form.
His set point is a bit lower than what many coaches teach, however. They usually want it to be at eyebrow level because it gives the shooter a clear vision of the rim.
Curry’s set point actually covers his right eye.
This works for him because he already took aim when he was making the catch and because of thousands of hours of practice.
His wrist is cocked and his arm forms a 90-degree angle with his body at the set point.
The ball NEVER stops on its way up and always stays in front of his face.
Curry’s lower than usual set point actually helps him have a quick, one-motion shot and it fits his rhythm, despite being unorthodox.
For many players, a lower set point will result in a flat ball trajectory but Curry avoids this issue with his release and follow-through.

Step 8 - Release
Curry’s release is all about consistency.
His jump is really low and it wouldn’t work if his motion was any slower.
However, Curry’s shot is lightning fast. A higher jump would just waste energy and turn his shot into a two-motion one, killing his rhythm.
An added benefit of a low jump is consistency.
Since his jump doesn’t need a lot of power, he can easily replicate his form even late in the game. This is huge once fatigue becomes a factor.
Another way Curry achieves consistent form is the timing of his snaps.
His wrist snaps at the same time his elbow straightens out completely. This timing is not easy to master but it’s a huge part of becoming a consistent shooter.
The snap of the wrist is fairly relaxed since he doesn’t need a lot of power from there.
Excellent rhythm and energy transfer generate all the power he needs. The arms just guide the ball on target.
As his wrist snaps, Curry transfers the weight of the ball from his palm to his fingers. The snap finishes with four fingers pointing down and the ball comes off the middle finger last.
This last part is unusual since most elite shooters usually end up with just their index finger pointing down. This feels natural to a lot of players and your players will probably prefer it.
Many great shooters will also let their feet float forward while in the air and they land in front of their starting position.
This motion alleviates tension and helps them get a better arc on the shot.
Curry does this only when he’s far behind the three-point line and needs some extra power. He almost never does it on regular shots.
I suggest you teach your players the sweep and sway since their energy transfer will likely be nowhere near as efficient as Curry’s.
Follow-Through
Follow-through is often overlooked when talking about shooting accuracy. An inconsistent follow-through will torpedo your shooting percentage.
Curry understands this and he ensures his follow-through remains the same on every shot.
Step 9 - Arms
After the release, Curry keeps his arm straight and his elbow is in line with his forehead. This gives the ball a nice arc despite the low set point.
Note that Curry’s arm is straight but it isn’t stiff.
His wrist is slightly flexed but it’s relaxed.
Curry does this to ensure accuracy without fatiguing his shooting arm and you should definitely teach this to your players.
Step 10 - Eyes
This is the final piece to Curry’s shooting puzzle.
His eyes stay locked on the target all the way until release. Once the ball is in the air, Curry’s eyes start following the path of the ball and his head tilts back a bit.
The most likely reason for this is awareness.
Great shooters like Curry can use the information they get from watching the ball to evaluate their mechanics on that particular shot.
This lets them immediately understand if they did something wrong and they’ll be more aware of it on the next shot.
Conclusion
There it is, the complete breakdown of the greatest shooter on the planet.
There’s a lot we can learn from the way Curry shoots but remember, it’s not about blindly copying everything he does.
It’s about understanding why his shot works so well and using that knowledge to create your own perfect form.
That is the ultimate goal here.
